

▸Table of Contents
- 1Custom Glass Bottle Mold Cost: What Buyers Need to Know
- 2Why Glass Bottle Mold Cost Is More Than a Single Number
- 3What Drives Glass Bottle Mold Cost
- 4New Mold vs. Existing Mold: Cost, Lead Time, and Design Freedom
- 5Before You Cut Steel: Confirm Four Things
- 6The Development Process, Step by Step
- 7Common Costly Mistakes Buyers Make
- 8How to Compare Mold Quotes Fairly
- 9Frequently Asked Questions
- 10Conclusion
Custom Glass Bottle Mold Cost: What Buyers Need to Know
For most brands, the very first question about a new custom bottle is a practical one: what will the glass bottle mold cost be? It is a fair question, because tooling is often the largest one-time expense before a single bottle ships. Therefore, this guide explains what actually drives that number, how new tooling compares with reusing an existing mold, and why confirming your design, capacity, neck finish, and sample acceptance standard early saves money later. Consequently, you can budget with confidence instead of guessing.
Why Glass Bottle Mold Cost Is More Than a Single Number
A mold quote is never just one price. In contrast, it is the sum of several steps, such as engineering, machining, polishing, testing, and final finishing. Moreover, the same bottle design can cost very differently depending on how many molds you need and how fast your filling line must run.
For this reason, treat every quote as a bundle. Specifically, ask your supplier to separate the engineering fee, the physical mold cost, and the sampling cost. As a result, you can see where the money really goes and where you can negotiate.
What Drives Glass Bottle Mold Cost
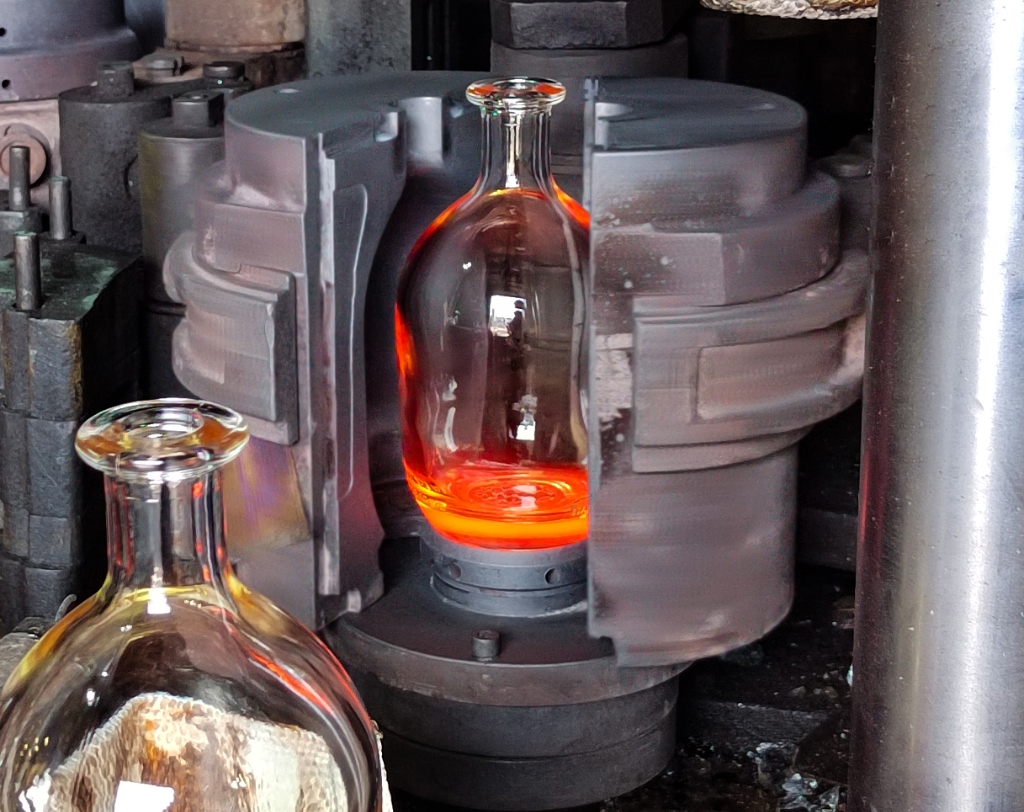
Several technical factors push tooling prices up or down. Furthermore, they usually work together, so a single change in shape can affect both cost and lead time.
| Cost factor | Lower impact | Higher impact | Why it changes the price |
|---|---|---|---|
| Bottle shape | Simple round body | Deep shoulders, sharp corners, asymmetric form | Complex geometry needs more machining and more hand finishing |
| Capacity and size | Standard 750ml | Very large or very small formats | Extreme sizes need heavier blanks and tighter process control |
| Mold structure | Two-piece mold | Three-piece, segmented, or split molds | Each extra part adds design and fitting work |
| Number of cavities | One cavity per mold | High-cavity production molds | More cavities mean more precision and more milling time |
| Neck finish | Standard finish | Custom threaded or special finish | A new finish needs its own gauges and fit testing |
| Surface detail | Plain glass | Embossing, deep texture, sculpted logos | Deep relief is hard to release and raises polishing cost |
| Prototype and sampling | Digital render only | 3D print plus physical sample | Physical testing adds a step, but it prevents costly rework |
Bottle shape and complexity
Initially, shape is the biggest single driver. For example, a clean cylindrical bottle is straightforward, whereas a faceted or sculpted design demands more precise cutting. To illustrate, an angled shoulder or a heavy base often forces extra polishing, so the tooling cost rises accordingly.
Size and capacity
Oversized formats and miniatures both add difficulty. On the other hand, standard formats such as 700ml and 750ml are the most efficient, because their tooling and process windows are well established. Conversely, a 50ml miniature needs very fine tolerances for the same visible quality.
Mold structure and cavity count
A two-piece mold is the simplest and cheapest structure. However, a design with undercuts may need a three-piece or segmented mold, which costs more. Besides, if you plan high-volume output, more cavities per mold reduce the per-bottle cost, although the upfront tooling price increases. In other words, you trade higher tooling for a lower unit price.
Neck finish and closure fit
The neck finish is easy to overlook, yet it decides whether your cap fits and seals. Therefore, always lock the finish specification before cutting steel. In particular, if you plan a Zamac, glass, or cork closure, confirm the exact thread or crown profile first. Otherwise, a small finish error can force a full mold rework.
New Mold vs. Existing Mold: Cost, Lead Time, and Design Freedom
Buyers often face a simple choice: cut a new mold or reuse an existing one. Each path has clear trade-offs.
| Item | New mold | Existing mold |
|---|---|---|
| Upfront cost | Higher, because of engineering and machining | Lower or none, since tooling is already made |
| Lead time | Longer, since design and sampling come first | Shorter, because production can start sooner |
| Design freedom | Full freedom to match your brand | Limited to the mold that already exists |
| Differentiation | Strong, your own unique shape | Weak, other brands may share the same shape |
| Risk | Front-loaded, but managed through sampling | Low, because the shape is already proven |
Furthermore, a new mold is not always the right answer. For instance, when speed and budget matter most, an existing mold gets you to market faster. However, when brand identity and shelf impact matter most, a new mold is the only way to stand out. Therefore, match the decision to your launch plan, not to a habit.
Before You Cut Steel: Confirm Four Things
Skipping early checks is the most common way to waste money. Accordingly, confirm these four points before any mold is machined.
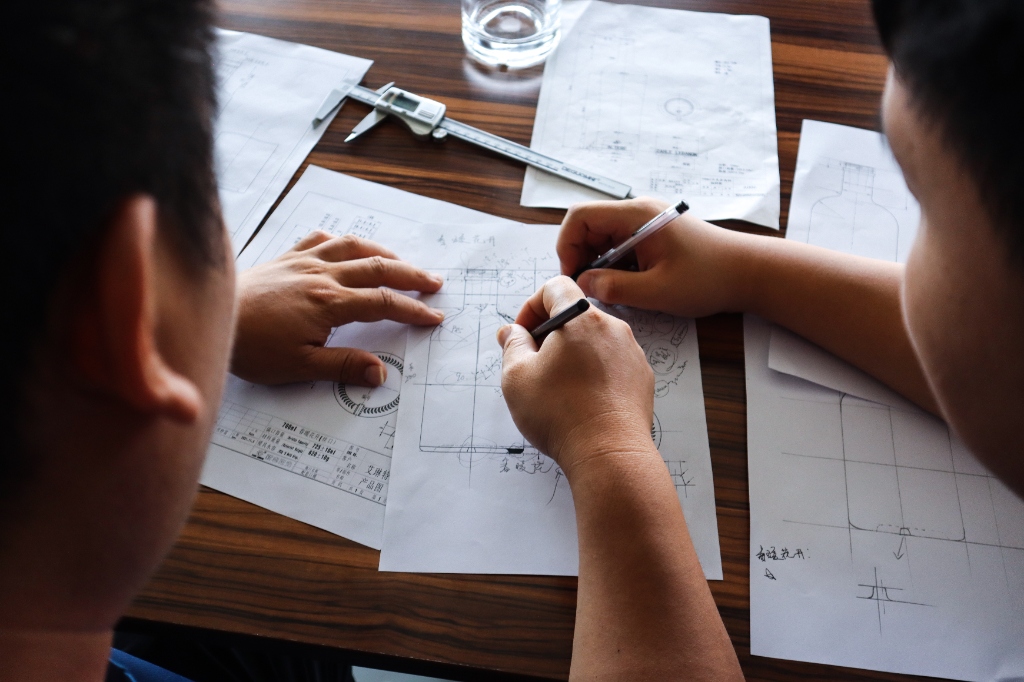
1. Design drawing: approve a dimensioned drawing, not only a picture.
2. Capacity: confirm the exact fill volume and the overflow volume.
3. Finish specification: lock the neck finish and closure compatibility.
4. Sample acceptance standard: agree on the defects and tolerances you will accept.
Subsequently, tie the acceptance standard to a written specification. Then, when the sample arrives, both sides judge it against the same checklist. Otherwise, a vague standard leads to disputes and delays.
The Development Process, Step by Step
Understanding the sequence helps you predict both cost and schedule. The process usually runs as follows.
1. Brief and drawing: you share the concept, capacity, and finish.
2. Engineering review: the factory checks feasibility and flags cost drivers.
3. Realistic sample: a resin 3D print confirms shape and feel before steel is cut.
4. Mold making: the tooling is machined and tested.
5. Sample bottles: real glass samples are produced and sent for your approval.
6. Mass production: production starts only after the sample is confirmed.
Meanwhile, each step should close before the next opens. Consequently, problems are caught early, when fixes are cheap. Conversely, problems found after mass production start are expensive.
Common Costly Mistakes Buyers Make
Several habits quietly raise the final bill. Moreover, most of them are easy to avoid.
– Approving a design from a render only, without a physical sample.
– Changing the neck finish after the mold is already cut.
– Ignoring the fill volume, then discovering an overflow mismatch.
– Choosing the cheapest tooling, then paying for rejects and downtime.
– Leaving the sample acceptance standard unwritten.
Therefore, slow down at the approval stage. In addition, ask your supplier to explain each cost line. As a result, you avoid surprises and protect your launch date.
How to Compare Mold Quotes Fairly
Not all quotes are built the same way. In addition, a low number can hide extra charges. For this reason, compare quotes line by line, as shown below.
| What to check | Why it matters |
|---|---|
| Scope of the tooling | Confirms how many molds and cavities you actually receive |
| Sampling included or not | Reveals hidden sample and shipping fees |
| Ownership of the mold | Shows who keeps the tooling after the order |
| Rework terms | Defines who pays if a sample fails |
| Maintenance and life | Indicates how long the mold will run |
Overall, a fair quote is transparent, itemized, and tied to a clear sample standard.
Frequently Asked Questions
What is the biggest factor in glass bottle mold cost?
Shape complexity is usually the biggest driver, because difficult geometry needs more machining and hand finishing. For this reason, simplifying the design early can cut tooling cost noticeably.
Is a new mold always more expensive than an existing one?
In general, yes, because a new mold includes engineering and machining. However, if no existing mold matches your brand, a new mold may still be the better long-term value.
Why confirm the sample before mass production?
Because fixing a problem on a sample is cheap, while fixing it during mass production is not. Therefore, always approve a real glass sample first.
For deeper context on the numbers behind the bottle, see our glass bottle manufacturing cost guide. In addition, learn how to avoid defects in our article on the hidden cost of skipping a resin 3D print sample before glass molding, review the hidden costs of your bottle shape, and check our complete guide to custom tequila bottle molds and costs. Finally, if you are still selecting a partner, read our guide to choosing the right glass bottle manufacturer for your brand.
Conclusion
In conclusion, glass bottle mold cost is not a mystery number. It reflects your design choices, your mold structure, and how carefully you confirm specifications before cutting steel. Therefore, define your drawing, capacity, and finish early, insist on a real sample, and compare quotes line by line. To achieve this, work with a partner who explains each cost openly rather than hiding it in a single figure. Reach out to our team today to review your bottle project and get a clear, itemized mold quotation.
Need Packaging Advice or a Quote?
Talk to our glass packaging experts — on time and on budget.


